In this example we connect a GUVA-S12SD UV Sensor to an Adafruit Feather M0 running Circuitpython
First lets look at some information about the sensor
Description
The GUVA-S12SD UV Sensor chip is suitable for detecting the UV radiation in sunlight. It can be used in any application where you want monitor for the amount of UV light and is simple to connect to any microcontroller. I recently noticed that some sellers had little modules for this sensor at a reasonable price so decided to purchase one
The module, with a typical UV detection wavelength of 200 – 370nm, outputs a calibrated analog voltage which varies with the UV light intensity so basically all you need to do is connect this to an ADC input and read in the value.
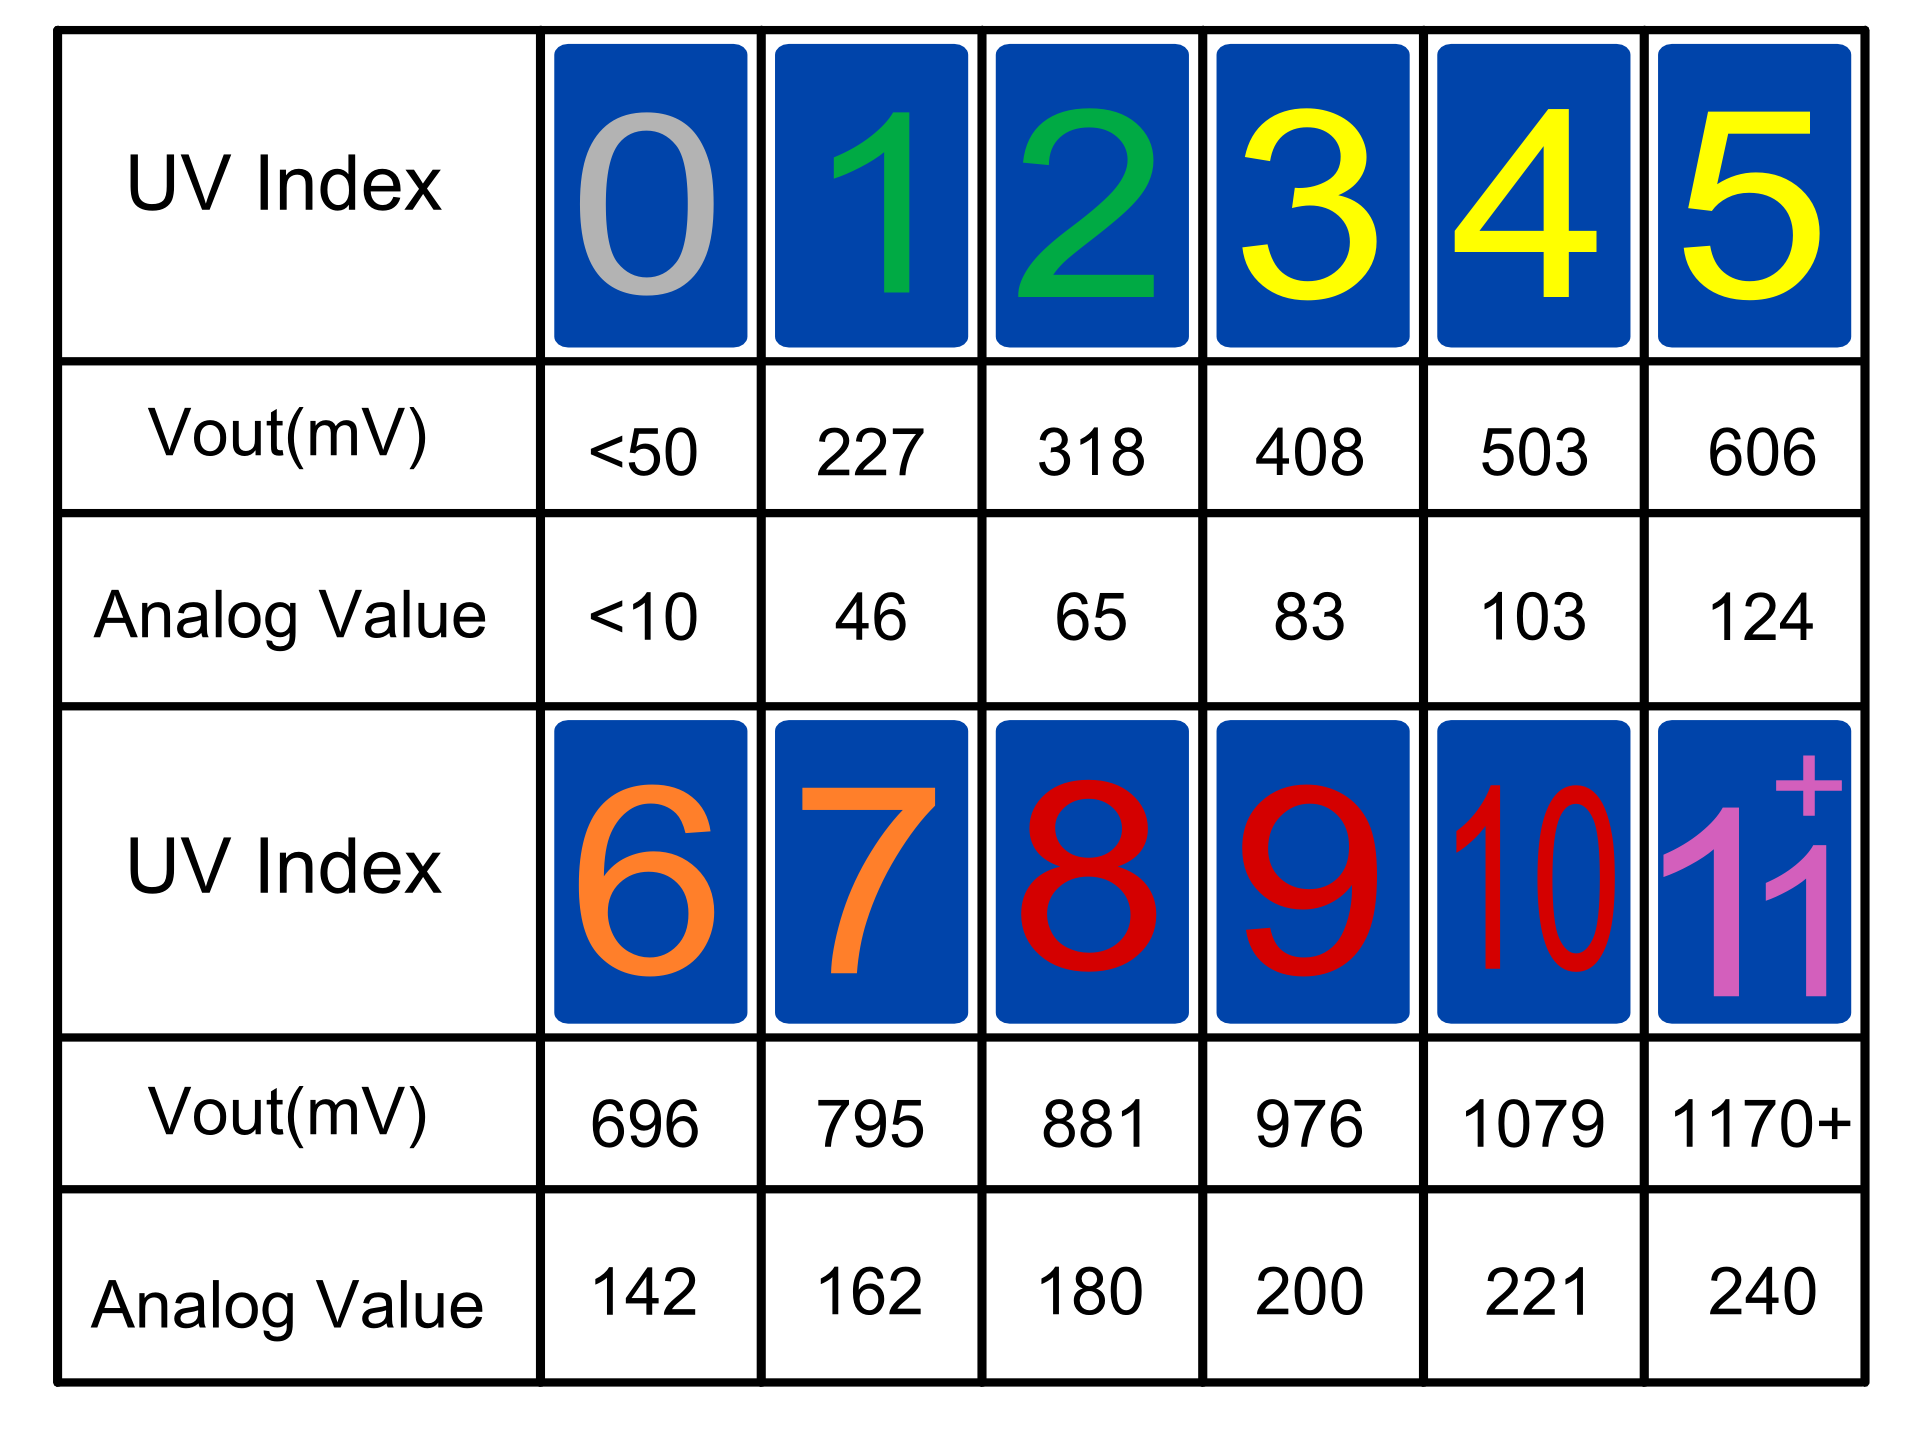
This value ties in with the UV index, this looks something like this

Connection
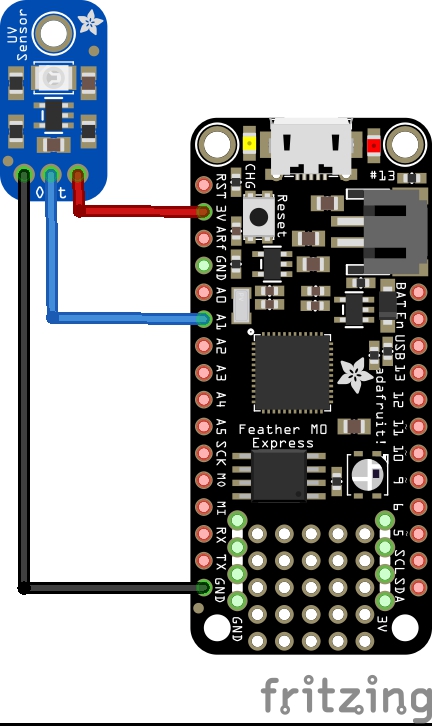
The connections are straightforward and described below, I used 3.3v from my Micro:bit. This was mainly for compatibility with other development boards but the module works with 5v.
1. GND: 0V (Ground)
2. VCC: 3.3V to 5.5V
3. OUT: 0V to 1V ( 0 to 10 UV Index)
Parts Required
| Name | Link |
| Adafruit Feather M0 Express | Adafruit (PID 3403) Feather M0 Express – Designed for CircuitPython – ATSAMD21 Cortex M0 |
| guva-s12sd | UV Sensor GUVA-S12SD Solar Ultraviolet Intensity Sensor 240nm-370nm 2.5V-5V |
| Connecting cables | Free shipping Dupont line 120pcs 20cm male to male + male to female and female to female jumper wire |
Schematic/Connection

feather and guva-s12sd layout
Code Example
I used Mu for development
[codesyntax lang=”python”]
import time
import board
from digitalio import DigitalInOut, Direction, Pull
from analogio import AnalogIn

pin = AnalogIn(board.A1)

def get_voltage(pin):
	return (pin.value * 3.3) / 65536

while True:
    print(get_voltage(pin))
    #print(pin.value)
    time.sleep(1)
[/codesyntax]
Output
Here is what I saw in Mu REPL window
0.0185303
0.0185303
0.0128906
0.0169189
0.0153076
0.0169189
0.0128906
0.0161133
0.0185303
0.0177246
0.0112793
Links


